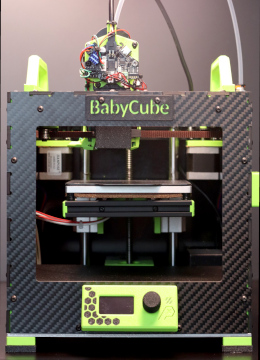
Building Vorons from kits is fun and all, but after having completed both a 0.2 and a 2.4 I got interested in building a small CoreXY printer from scratch. Looking around, I found Martin's wonderful Babycube project. Originally it was designed for a printed frame, but Martin had a preliminary carbon fiber variant that I decided to build. But where do you get precision machined 3 mm CF sheets? Some googling suggested that my options were water jet cutting or CNC milling, so I talked to the workshop guys at $work. Turns out water jet cutting needs pre-drilling and has delamination issues, and they would not let abrasive CF dust anywhere near their CNC mills, so after some more research I decided to do it myself. I've never CNC milled anything in my life, but there's a first time for everything, amirite?
So I bought an el cheapo 3018 CNC and started learning about CAD/CAM, tool paths, feed rates, depth of cut, end mill types etc. I also discovered and set up the awesome Kiri:Moto CAM processor and cncjs control software.
In order to deal with the very nasty, abrasive and conducting dust that is generated when milling carbon fiber, I built a waterbath to go on my 3018. It binds the dust and also cools the mill. Using a 2 mm end mill at full RPM, a feed rate of 150 mm/min and a DoC of 0.4 mm, the 3018 handles carbon fiber like a champ! It takes a while to cut all 5 sides (the bottom of the Babycube is made from aluminium), but the result is very nice.
The rest of the the built is pretty straightforward, but I made a few modifications to Martin's design, most notably:
- Instead of the BTT E3 board + Raspberry Pi, I used a Mellow Fly Gemini that I had in a drawer. It fits into the electronics bay if you mount it upside down.
- I wanted a direct drive extruder, so I fitted a CanBus-enabled Mini Stealthburner toolhead. I lose a few millimeters of Y travel, but that's ok.
- I replaced the printed bed holder with a 1515-based design inspired by Martin's draft.
- I installed a servo-actuated KlickyNG probe to ensure nice first layers.


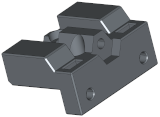
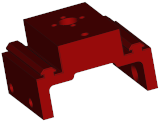
- the center piece of the bed holder
- an adapter to mount the Mini Stealthburner to a MGN9C rail
- 1515 endcaps for the front bed extrusion
- TPU feet for the Babycube
The whole thing runs Klipper of course. Here's a picture gallery of the finished printer.
