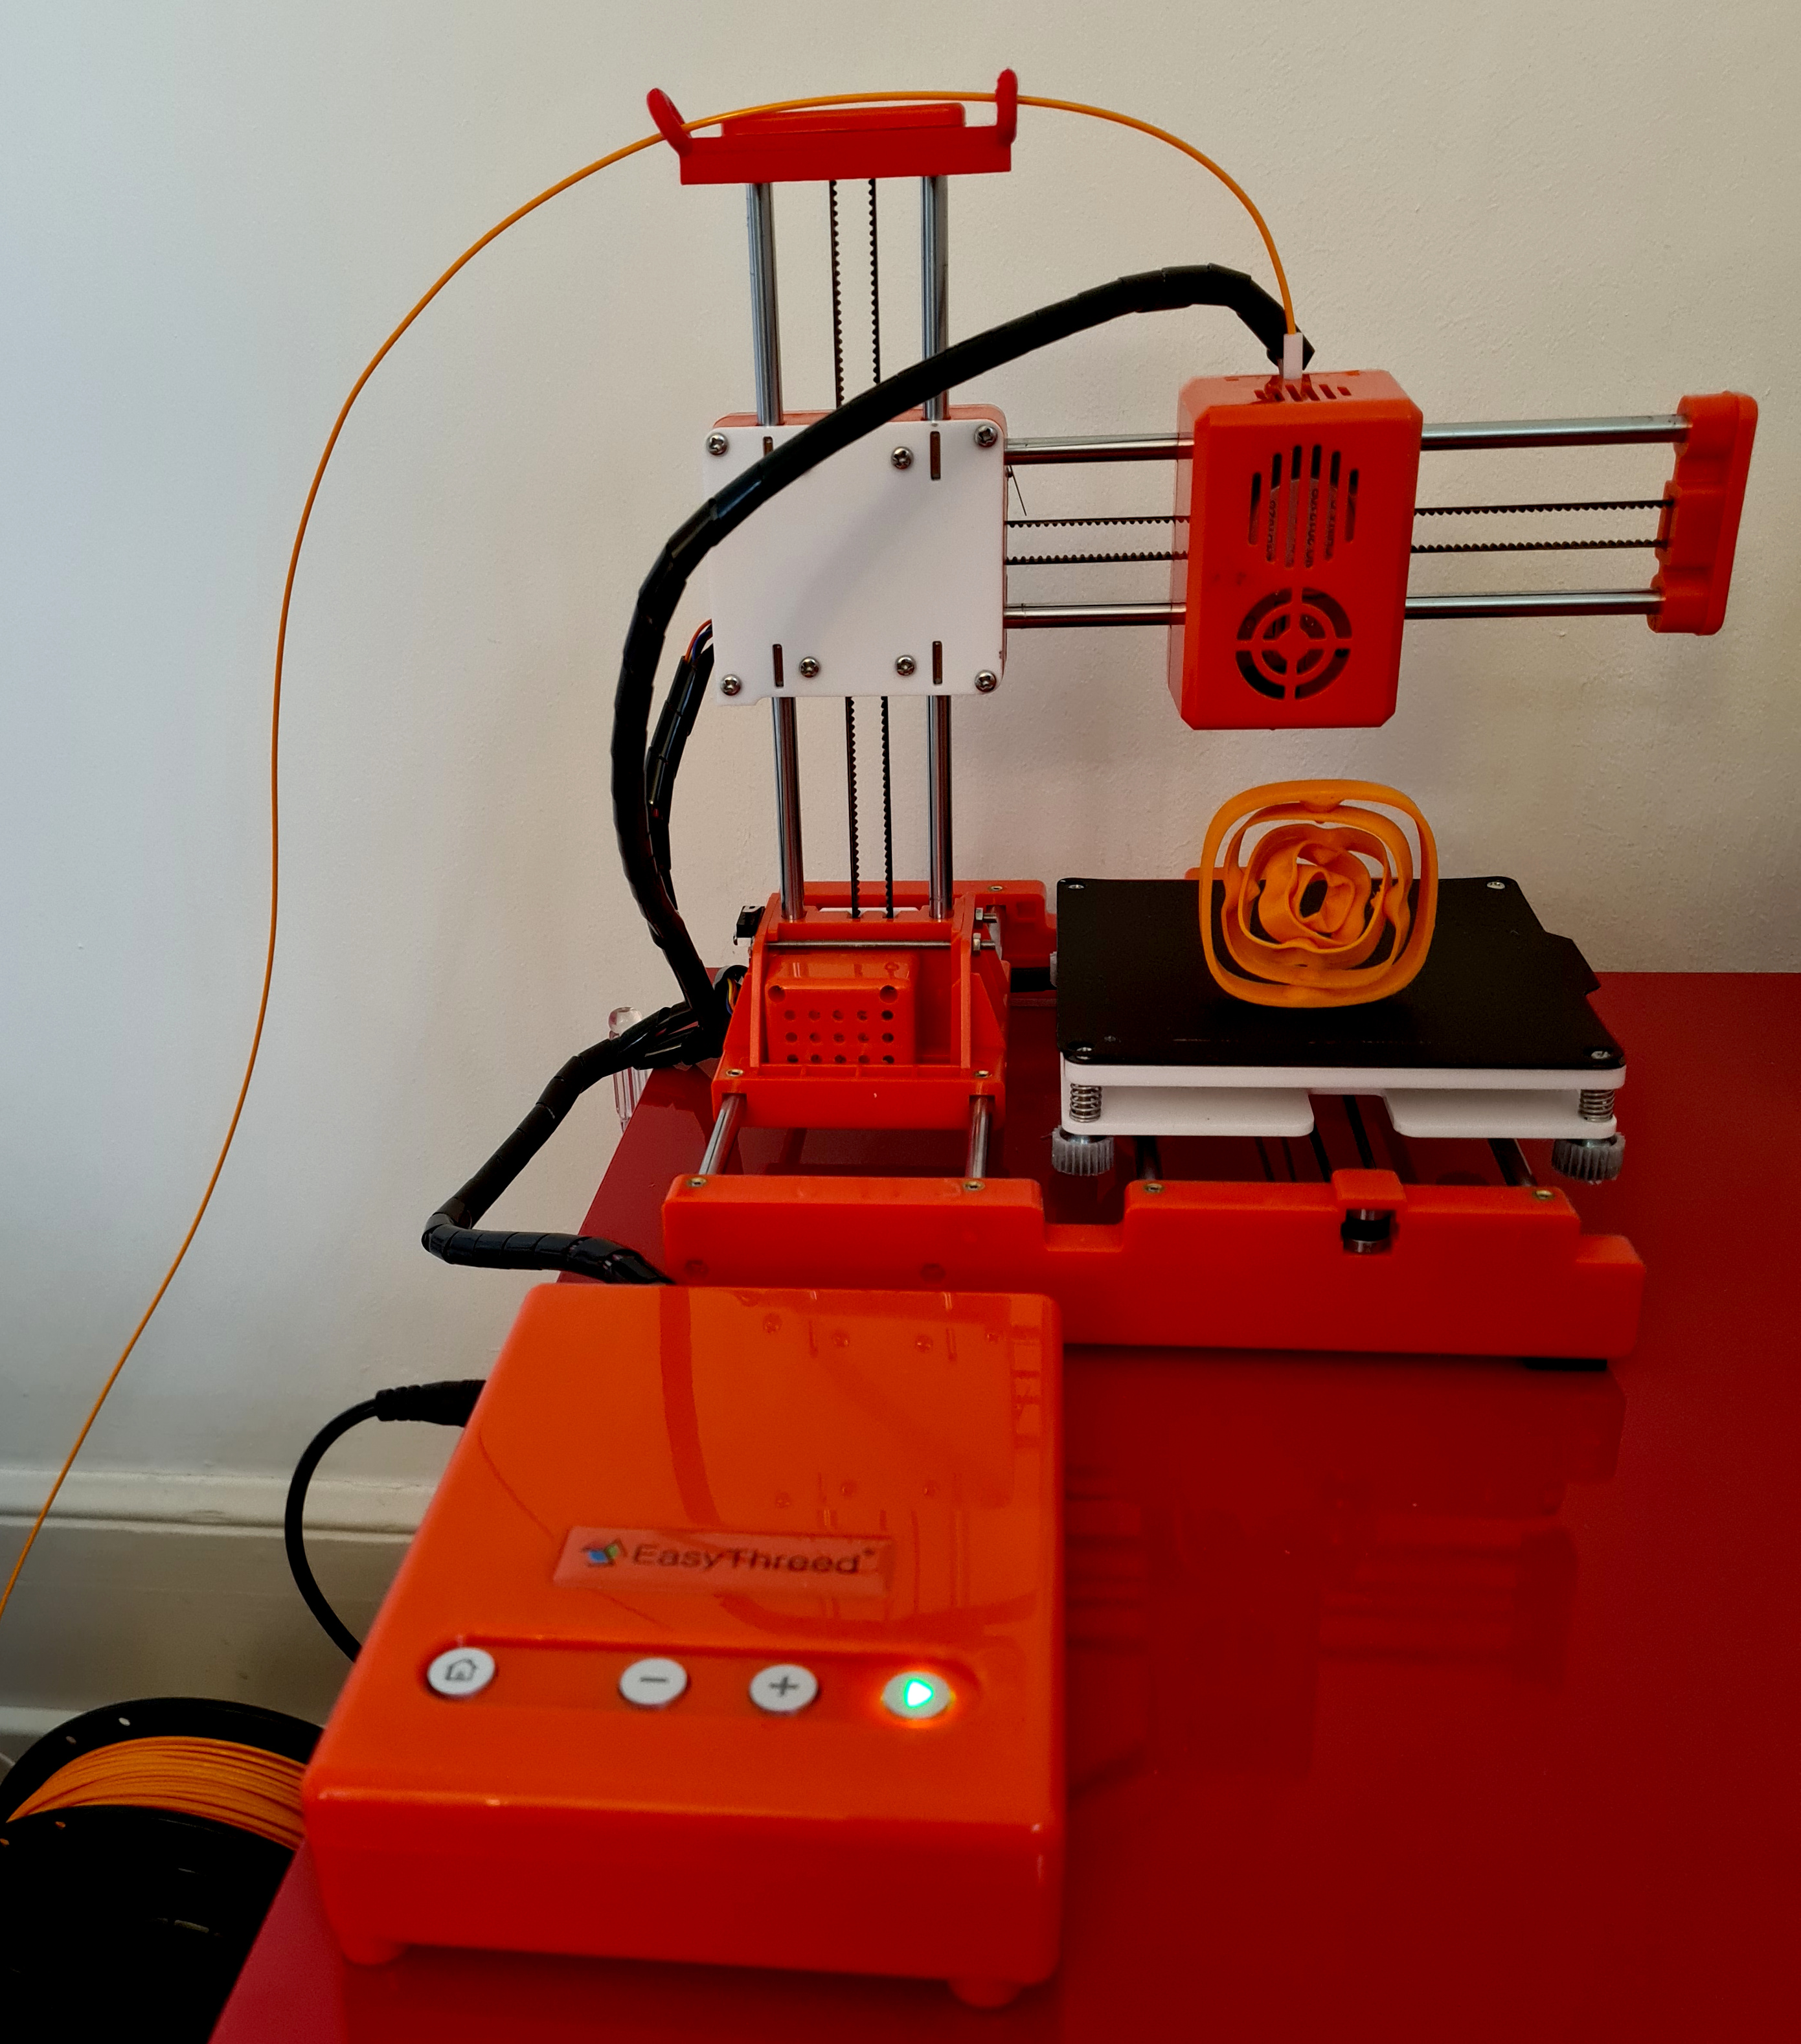
Ever since first seeing reviews of the Easythreed X1 budget 3D printer I had been wondering just how usable such a cheap device could possibly be. My frankensteined Anet A8 is my 3D print workhorse, but it's rather bulky and since I don't have a workshop, I have to get it out of the closet in order to print something and put it back afterwards. So a compact printer did have some appeal: it could sit unobtrusively in a corner and be ready to print in no time. And let's face it: >90% of all everyday prints easily fit into the X1's (100 mm)3 build volume. Long story short, when I saw an X1 for ~65 EUR, I ordered it. A few days later: unboxing and first print. I was blown away: it is tiny. It is QUIET. The first print (demo cat model) actually looked good. Granted, it sat on a raft, but resolution was good and it had amazingly smooth side walls. I was in love.
But of course the machine wasn't perfect:
- Some of the belts were quite loose. This can be easily fixed by slightly moving the mounts of the X, Y and Z metal rods.
- Even though current X1 models come with a built-in part cooling fan, this tiny 25 mm fan doesn't move a lot of air. I replaced it with a 50 mm radial blower and this thing to get better cooling.
- The biggest issue: the geared steppers exhibit some backlash. While it isn't too obvious in X and Y, it is a problem in Z and I'm sure it's the reason why the demo cat sat on a raft. Fortunately, there's an easy fix too: use Marlin 2.0 with backlash compensation.
Marlin 2.0
This guy GloSense published a version of Marlin 2.0 adapted for the X1. He reworked the buttons and the status LEDs, but the biggest improvement is M425, Marlin 2.0's backlash compensation. Just measure backlash in X, Y and Z and put the resulting values in your start gcode. Mine now looks like this (for Prusa Slicer):
M104 S[first_layer_temperature] ; set extruder temp
M140 S[first_layer_bed_temperature] ; set bed temp
M190 S[first_layer_bed_temperature] ; wait for bed temp
M109 S[first_layer_temperature] ; wait for extruder temp

G21 ; set to milimeters
G90 ; absolute position movement
M82 ; use absolute distances for extrusion

M201 X90 Y90 Z90 E200 ; acceleration
M203 X40 Y40 Z12 E30 ; feedrate
M204 P250 R250 T250 ; PRT acceleration
M205 X3.0 Y3.0 Z0.4 E1.5 ; jerk settings
M301 P22.02 I4.20 D28.86 ; PID settings
M304 P136.22 I26.40 D468.66 ; PID bed
M92 X597.76 Y597.76 Z1160.00 E1040.00 ; Unit A, 1:32 gears
;M92 X467.00 Y467.00 Z1160.00 E1040.00 ; Unit B, 1:25 gears
M425 X0.3 Y0.4 Z0.3 ; my backlash compensation settings Unit A
;M425 X0.3 Y0.4 Z1.2 ; my backlash compensation settings Unit B
M425 F1 S0.2 ; compensate backlash over 0.2 mm
M900 K0.25 ; linear advance

M117 Cleaning...
G28 ; home all axes
G1 Z15 ; lift nozzle
G92 E0 ; reset extruder
G1 Z0.2 X5 ; position for purge line
G1 F350 X90 E15 ; purge line finish
G1 F500 ; set feedrate for move to print starting point
G92 E0 ; reset extruder
M117 Printing...
Note that I encountered two different types of X/Y steppers: 1:25 and 1:32 gear reduction, hence the different M92 step values. While I was at it, I also increased the preheat temperature from 200 C to 220 C in order to be able to purge and print PETG (this is in MarlinCore.cpp):
@@ -621,7 +621,7 @@
         if (all_axes_known()) {
           if (thermalManager.degHotend(active_extruder) < EXTRUDER_RUNOUT_MINTEMP) {
             LED_STATS = 1;
-            thermalManager.setTargetHotend(200, 0);
+            thermalManager.setTargetHotend(220, 0); //daduke increase init temp
           }
           if (thermalManager.degHotend(active_extruder) > EXTRUDER_RUNOUT_MINTEMP ){
             LED_STATS = 1;
@@ -679,7 +679,7 @@
       if (WITHIN(cmtime, SBT, LBT)){    // short press
         if (thermalManager.degHotend(active_extruder) < EXTRUDER_RUNOUT_MINTEMP) {
           LED_STATS = 2;
-          thermalManager.setTargetHotend(200, 0);
+          thermalManager.setTargetHotend(220, 0);   //daduke increase init temp
         }
         if (thermalManager.degHotend(active_extruder) > EXTRUDER_RUNOUT_MINTEMP){
           LED_STATS = 2;
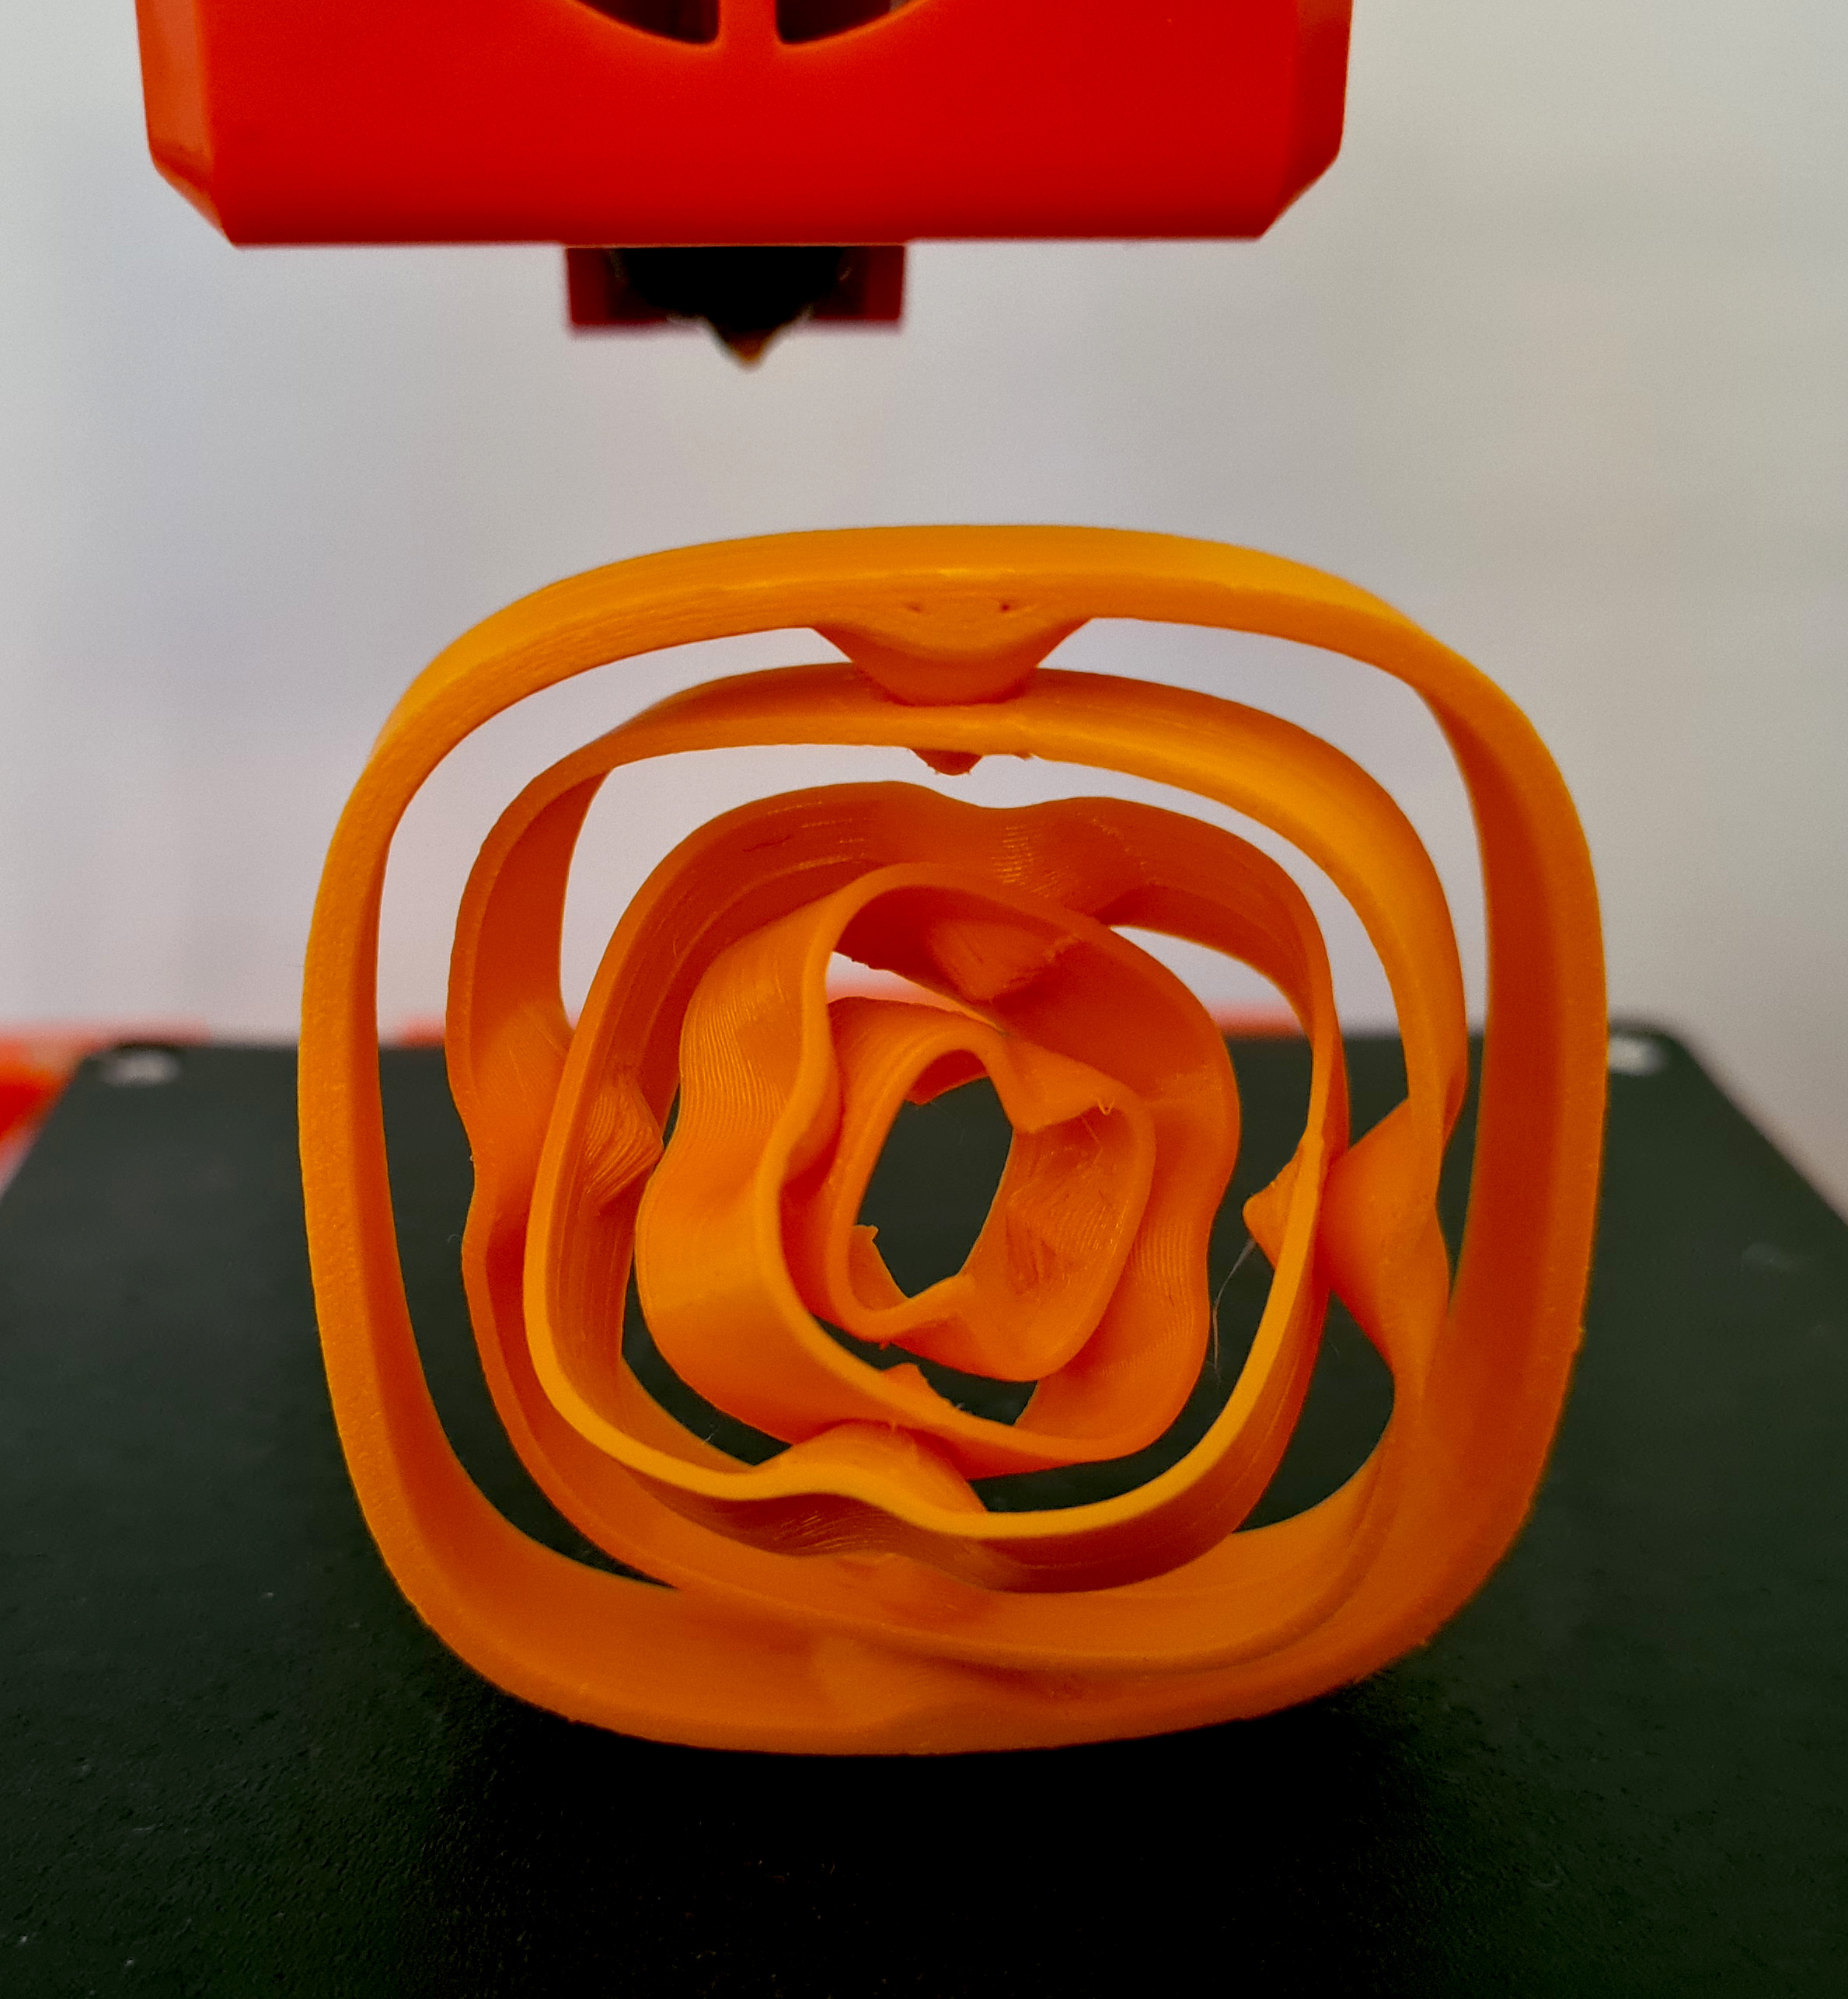
 Then I compiled (Sanguino ATmega1284 16 MHz) and flashed the new Marlin firmware and the results are AMAZING. The first layer is perfect without a raft and I can print PLA and PETG without any issues. I use PrusaSlicer and get very good results.
I also added the heated bed upgrade since larger parts tend to warp without a heated bed. The add-on comes with a weird custom control board in a 3d-printed enclosure, even though the X1 board is fully equipped with connectors for both a bed heater and a bed NTC, so of course I use those. I soldered a 100k thermistor directly onto the respective pads on the underside of the bed and configured Marlin accordingly. I also tuned the extruder and bed PID settings to get the best temperature control.
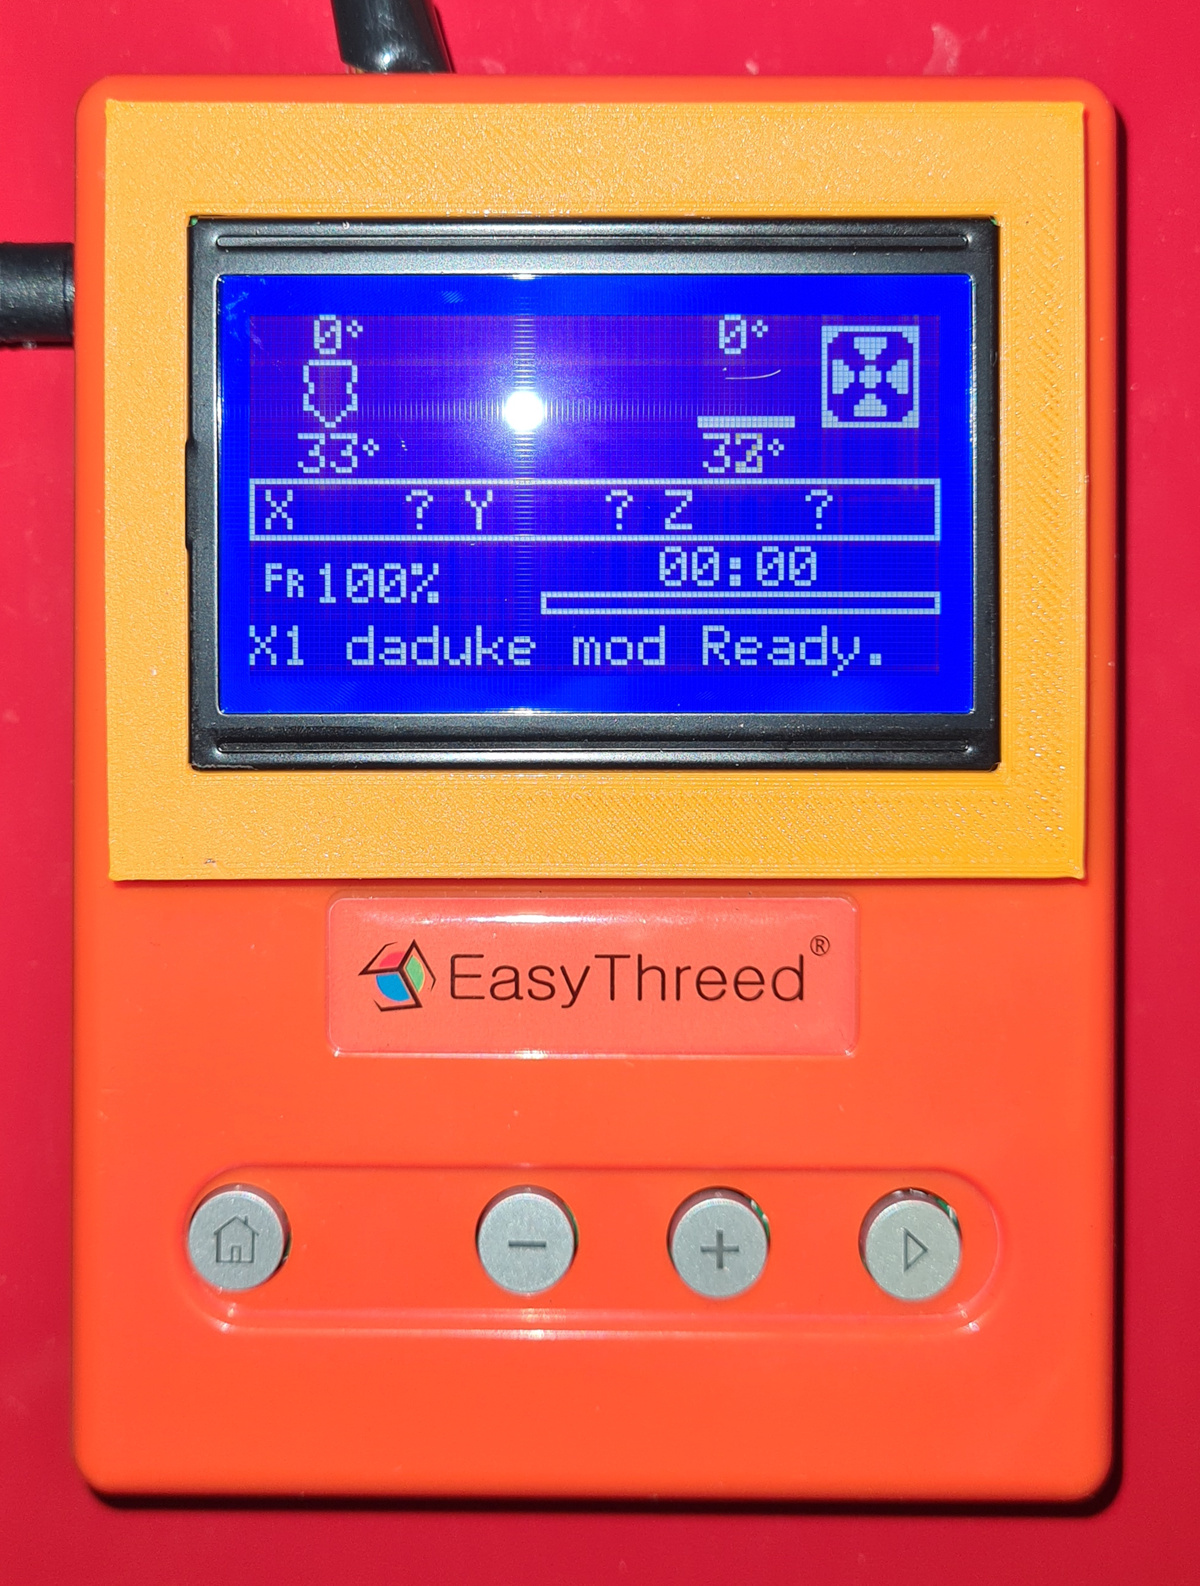 Recently I retrofitted a RepRap full graphics LCD to the X1 instead of the status LEDs in order to get better visual feedback. Works a treat!
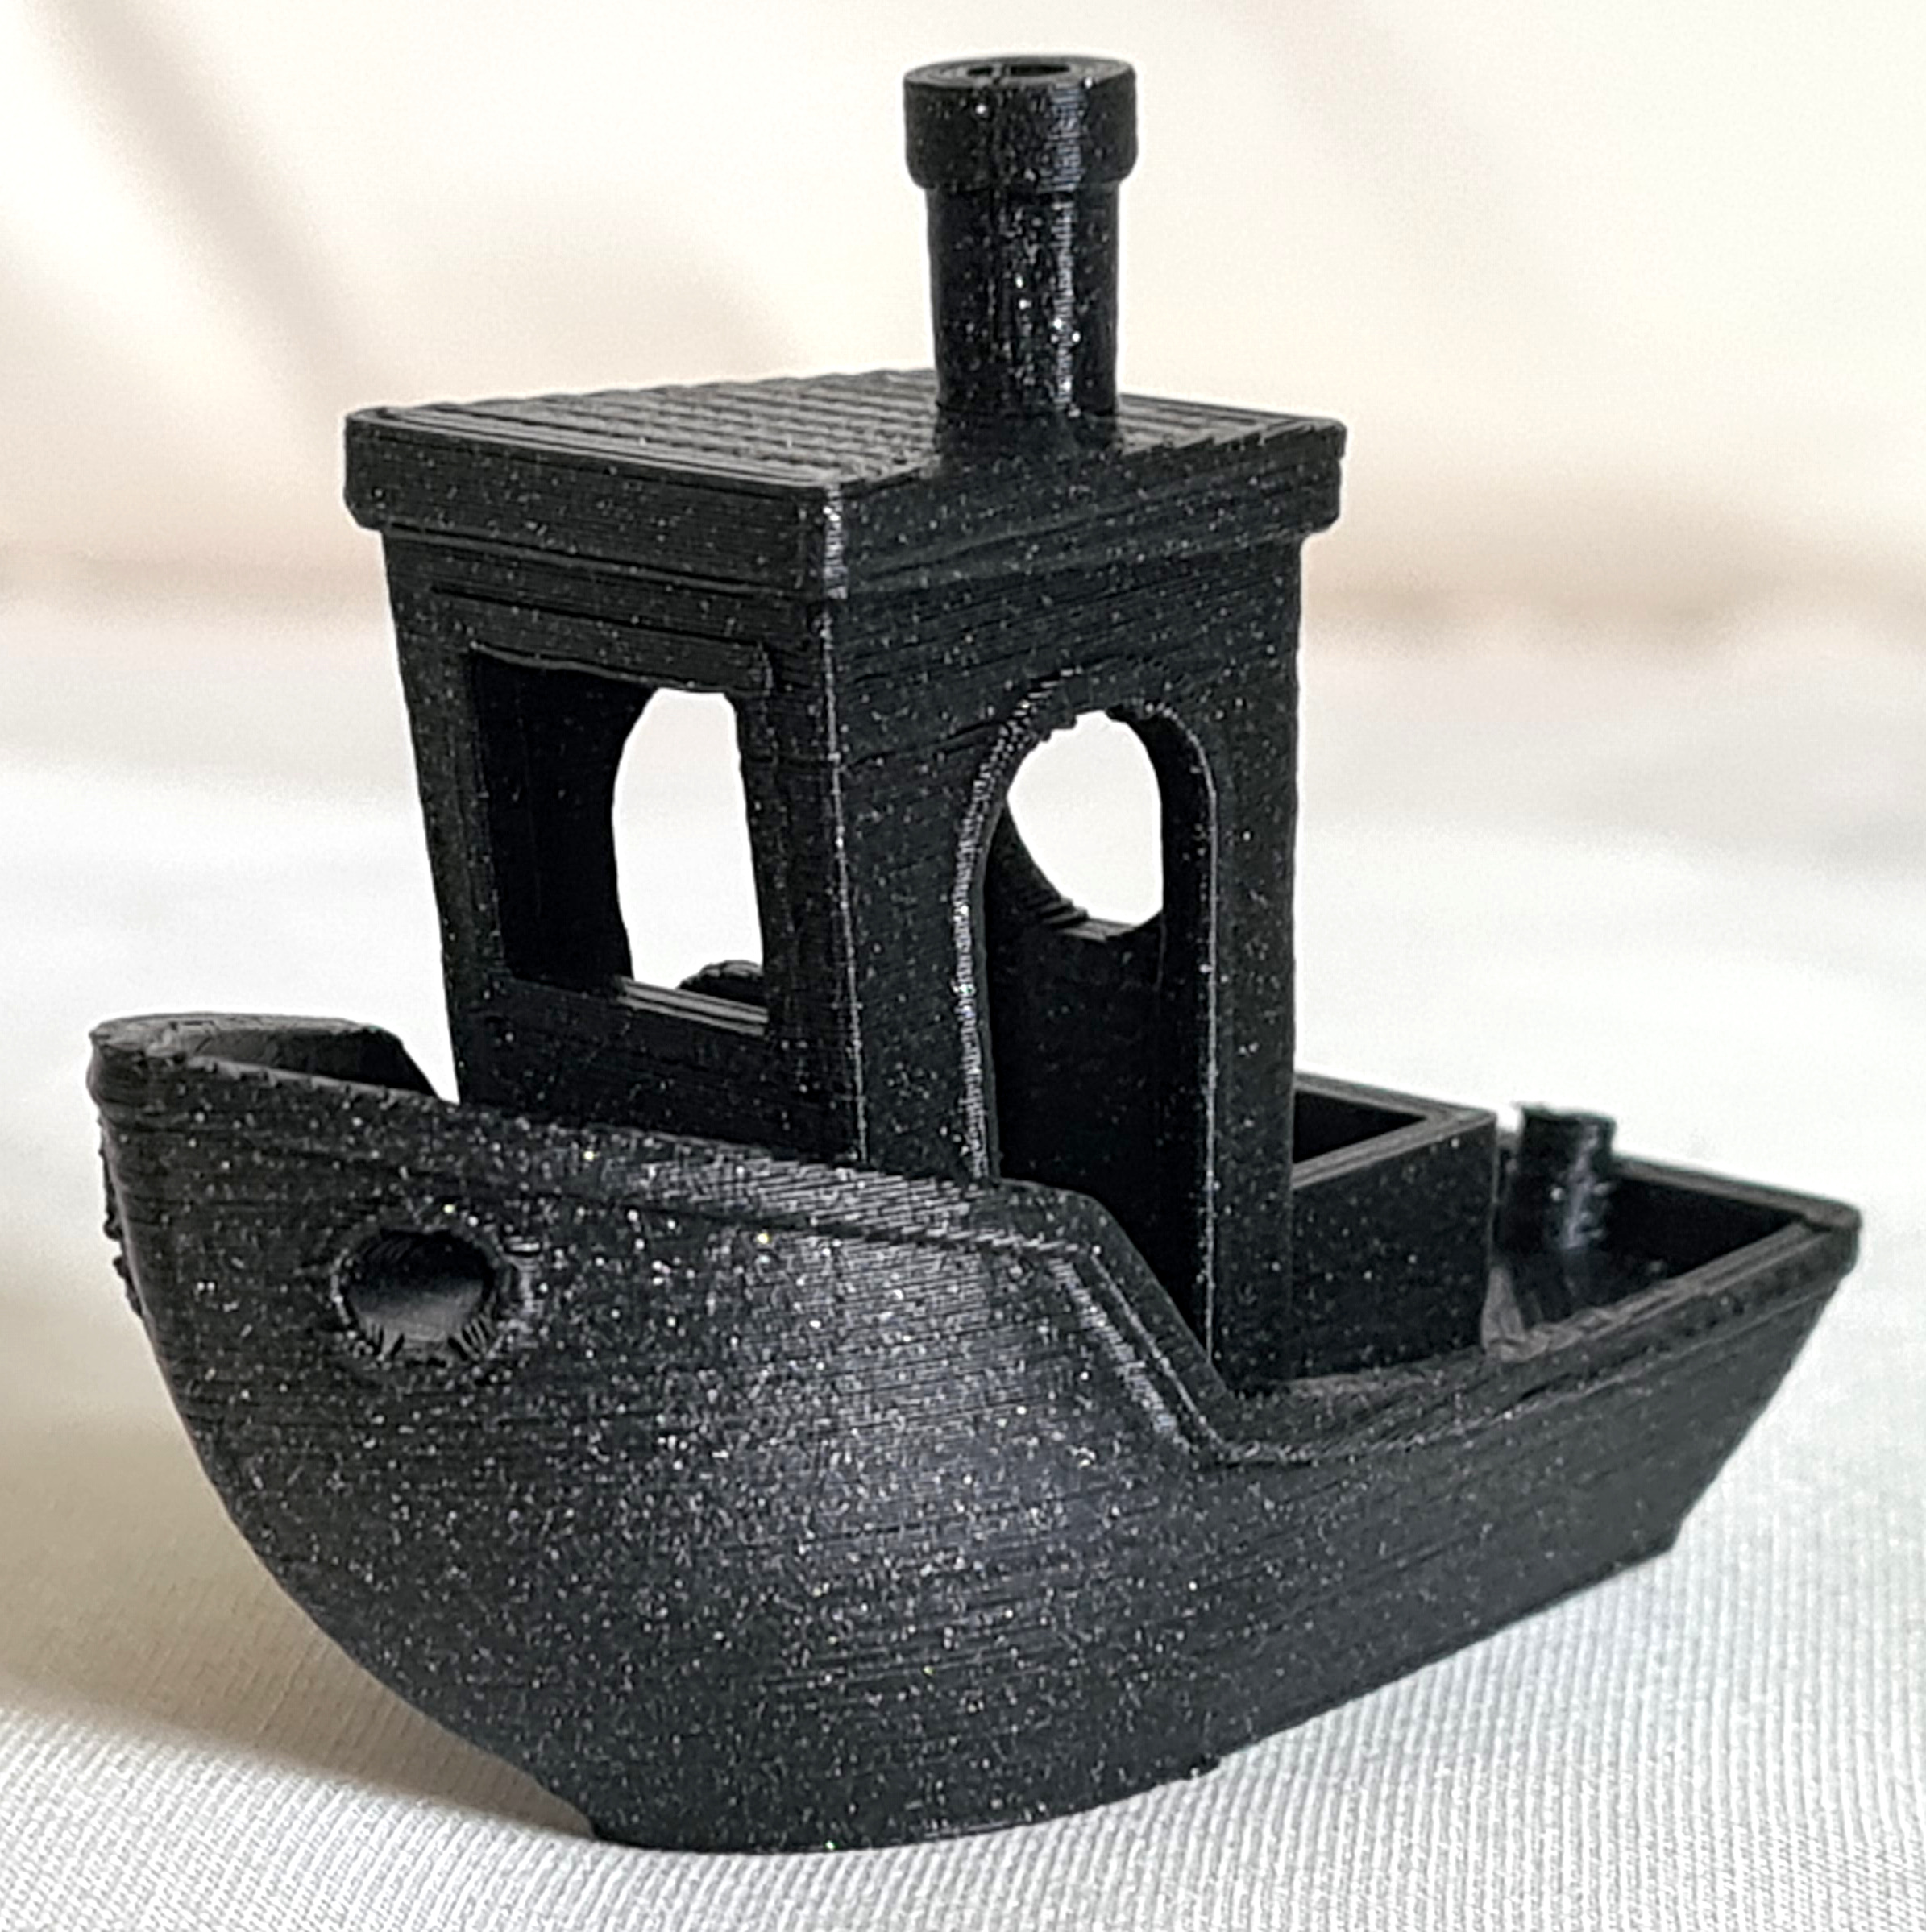
So, was it worth it? Absolutely. I'm still amazed by the print quality I can get out of this little machine and it's my go-to printer for everyday jobs. The A8 only comes out for large or ABS prints. 3D printing has come a long way in the last years and now a 65 EUR 'toy' can produce very decent results.
What is your experience with Easythreed's budget printers? I'd be happy to share tips and tricks and learn about your results!
 - last change: 2021/07/17